 Save
Save The first time I made beet hummus, I was standing in my kitchen on a gray Tuesday afternoon, honestly just trying to use up a bunch of beets before they went soft in the crisper drawer. My hands turned that telltale magenta color as I peeled them fresh from the oven, and when I blended them with the chickpeas and tahini, something magical happened—this shocking pink dip emerged that looked almost too pretty to be real. My roommate walked in mid-blend and literally stopped in her tracks, asking if I'd added food coloring. I hadn't, and that moment made me realize this humble vegetable had just become my new favorite way to impress people without actually trying.
I brought this to a potluck last spring where everyone showed up with the same beige hummus situation, and watching people actually get excited about food that was, you know, a color felt surprisingly validating. Someone asked for the recipe right away, and when I explained it was basically just roasted beets plus traditional hummus logic, they seemed almost disappointed that it wasn't more complicated. But that's the secret—simplicity done well always feels like a discovery.
Ingredients
- Medium beets: Two medium ones roast perfectly in about 40 minutes and give you enough earthiness to shine through without overpowering the other flavors.
- Olive oil: Use a good quality one for roasting the beets and for drizzling at the end—it makes a noticeable difference in how luxurious the final dip feels.
- Canned chickpeas: Drain and rinse them thoroughly to remove excess starch, which keeps your hummus from getting gluey.
- Tahini: This is where the creamy richness comes from, and yes, it contains sesame so note that for guests with allergies.
- Fresh lemon juice: Bottled just doesn't have the same brightness, so squeeze it yourself if you can.
- Garlic cloves: Two raw ones give a pleasant bite, but if you prefer something mellower, roast them alongside the beets.
- Ground cumin: This spice ties everything together and reminds your palate that this is inspired by Middle Eastern flavors.
- Sea salt: Fine sea salt dissolves more evenly than kosher, so you avoid those surprise salty pockets.
- Cold water: Add it slowly at the end to achieve that silky, spoonable consistency without watering down the flavor.
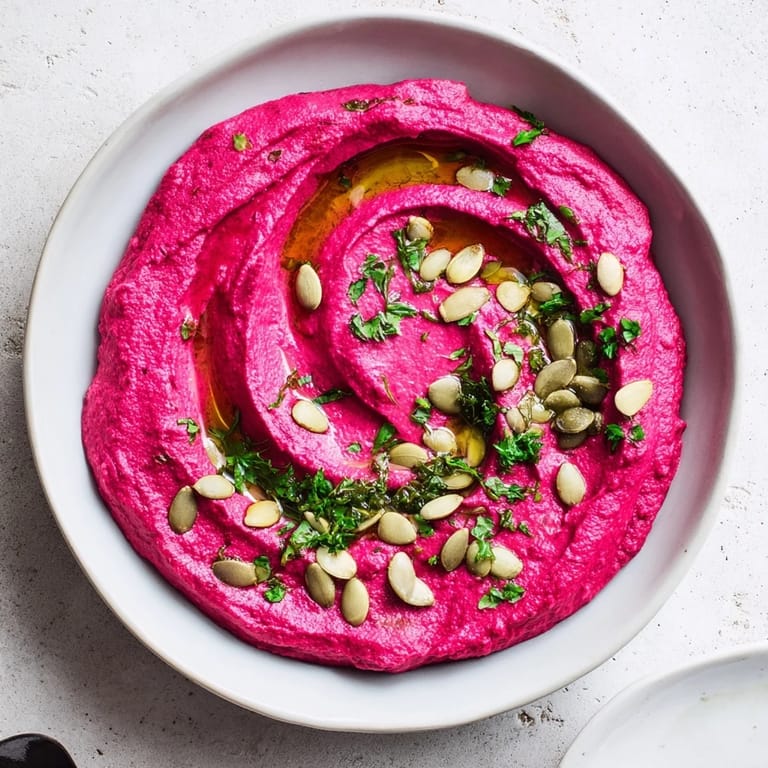
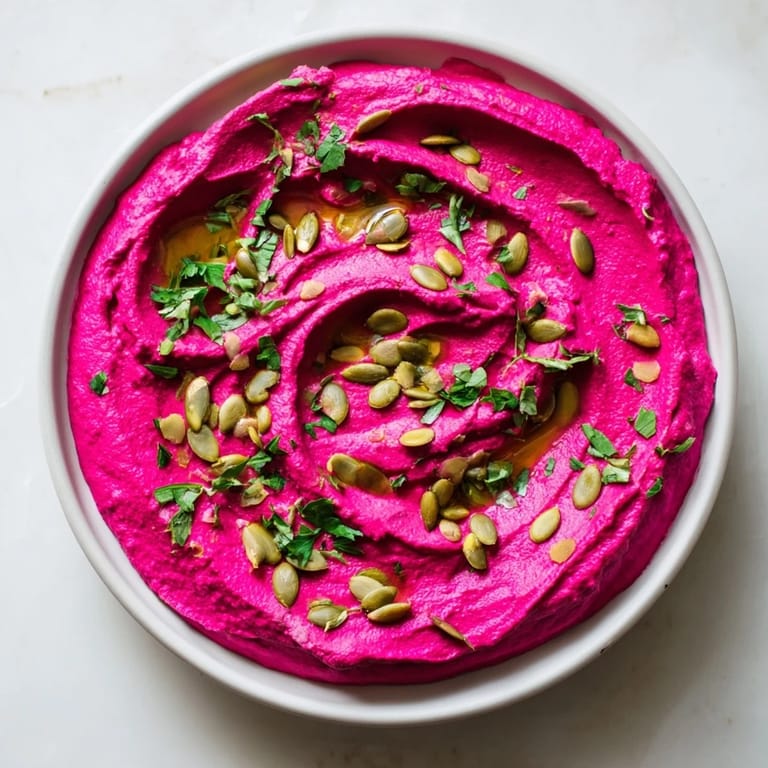
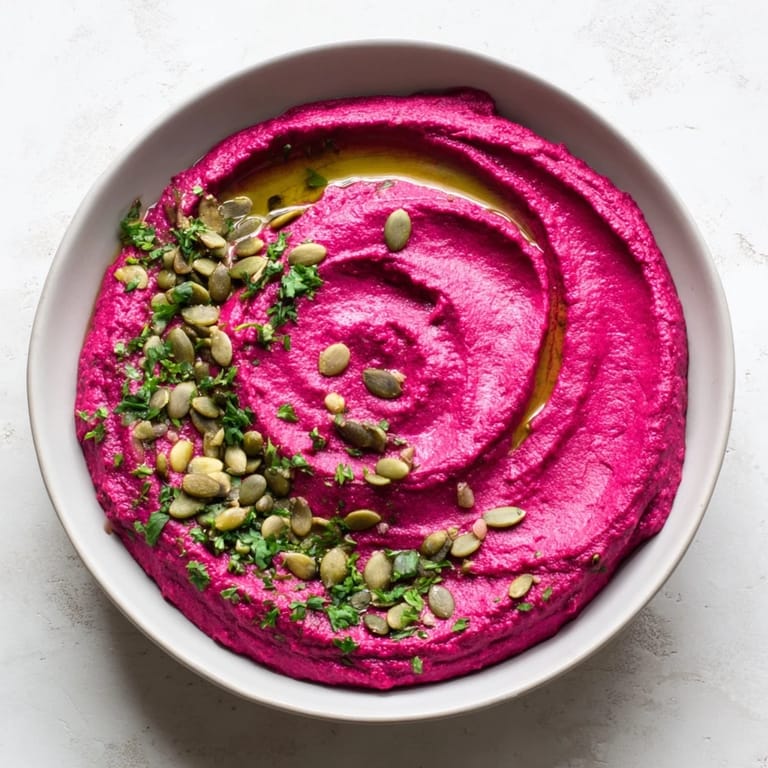
- Toasted seeds: Pumpkin or sesame seeds add a textural surprise and a finishing touch that feels intentional.
- Fresh parsley: Just a small handful chopped over the top brightens everything and looks beautiful.
Tired of Takeout? 🥡
Get 10 meals you can make faster than delivery arrives. Seriously.
One email. No spam. Unsubscribe anytime.
Instructions
- Roast those beets until they surrender:
- Preheat your oven to 400°F, wrap each trimmed beet loosely in foil with a drizzle of olive oil, and slide them onto a baking sheet. You'll know they're done when a fork slides through without resistance, usually around 35 to 40 minutes depending on their size.
- Let them cool enough to handle:
- This is not a step to rush—warm beets are slippery and harder to peel, plus the cooling time lets the flavors settle. Once they're cool enough, the skin practically slips off under cool running water.
- Build the hummus base:
- Combine your peeled, chopped beets with the drained chickpeas, tahini, lemon juice, olive oil, garlic, cumin, and salt in your food processor. Blend everything together until you have a mostly smooth texture, which usually takes about 2 minutes of processing.
- Add water gradually for silky perfection:
- With the motor still running, drizzle in the cold water bit by bit, letting the processor do the work rather than dumping it all in at once. You're looking for that moment when the texture shifts from thick and grainy to cloud-like and spoonable, which usually happens after about 2 to 3 tablespoons.
- Taste and adjust with intention:
- Give it a taste and listen to what it's asking for—more salt, more lemon, more garlic, more cumin. These small adjustments are where hummus goes from good to the kind people remember.
- Plate it like you mean it:
- Scoop your hummus into a shallow serving bowl, use the back of a spoon to create gentle swirls in the surface, and drizzle a little olive oil in the center. Scatter those toasted seeds and fresh parsley over the top, and step back to admire your work.
 Save
Save Last month a friend texted me a photo of this dip at her dinner party with five question marks, and I realized that's when food stops being just something you eat and becomes something you remember. She said her guests were genuinely surprised it was vegan, which I think is the highest compliment a plant-based dip can receive.
The Roasting Game Changes Everything
Here's something I didn't expect: roasting beets instead of using raw or canned ones completely transforms the flavor profile. The oven concentrates their natural sugars and deepens their earthiness, which is why this hummus tastes so much more sophisticated than I initially thought it would. Raw beets would give you a more vegetal, peppery note, but roasted ones deliver this mellow sweetness that balances the lemon and tahini beautifully.
Storage and Make-Ahead Magic
This hummus keeps beautifully in an airtight container in the refrigerator for up to five days, which means you can make it the day before a gathering and actually have time to breathe. The flavors actually deepen slightly overnight, so if anything, it tastes better the next day. Just give it a stir and add a fresh drizzle of olive oil before serving, as the top may darken slightly from oxidation.
Variations Worth Exploring
Once you nail this version, you'll start seeing possibilities everywhere—I've experimented with golden beets for a sunset-colored version, added a pinch of pomegranate molasses for extra tang, and even tried swirling a spoonful of regular hummus through the center for visual drama. The foundation is so solid that you can play with it without losing the soul of the dish. Every variation still delivers that same moment when someone asks if you really made this yourself.
- Golden beets create a warm yellow dip that feels like autumn in a bowl.
- A tiny splash of pomegranate molasses adds complexity and a subtle fruity note that guests will sense but not quite name.
- Roasted red peppers blended with the beets shift the flavor toward something more Spanish-inspired and equally stunning.
 Save
Save This hummus has quietly become one of those recipes I return to again and again, partly because it's easy but mostly because it never fails to make people happy. There's something about bringing a bowl of unexpected color to the table that just lifts the whole mood.
Recipe FAQs
- → Can I use canned beets instead of roasting fresh ones?
Yes, canned beets work well as a time-saving alternative. Drain and rinse thoroughly to remove excess liquid and reduce earthiness. Use about 1 cup of canned beets, which equals roughly 2 medium fresh beets.
- → How do I achieve an ultra-creamy texture?
The key is adding cold water gradually while the food processor is running. Start with 2 tablespoons and add more as needed, one tablespoon at a time. This creates a silky, spreadable consistency without thinning it too much.
- → What can I substitute for tahini?
Greek yogurt or sour cream work as alternatives, though they'll change the flavor profile slightly. For a nut-based option, try sunflower seed butter or roasted almond butter in equal amounts.
- → How long does this keep in the refrigerator?
Store in an airtight container for up to 4 days. The color may darken slightly over time, but the flavor remains delicious. Stir well before serving and add a drizzle of fresh olive oil on top.
- → Is this truly vegan and gluten-free?
Yes, all components are naturally vegan and gluten-free. However, always verify labels on tahini and seeds for cross-contamination warnings if serving guests with allergies, as processing facilities may handle gluten-containing products.
- → Can I make this ahead for entertaining?
Absolutely. Prepare the hummus up to 2 days in advance and store covered in the refrigerator. Add the garnish of olive oil, seeds, and parsley just before serving for the most vibrant presentation.