 Save
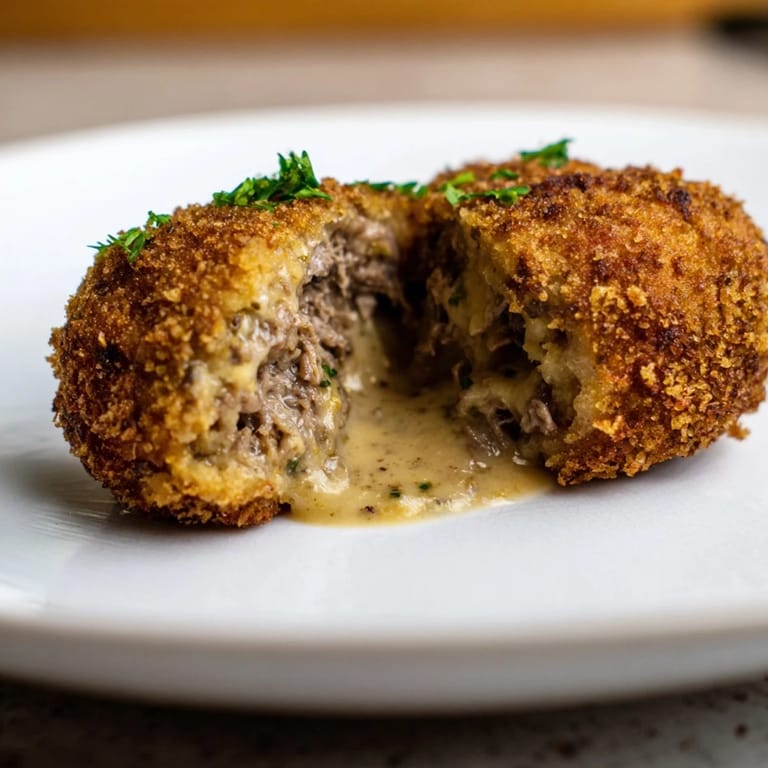
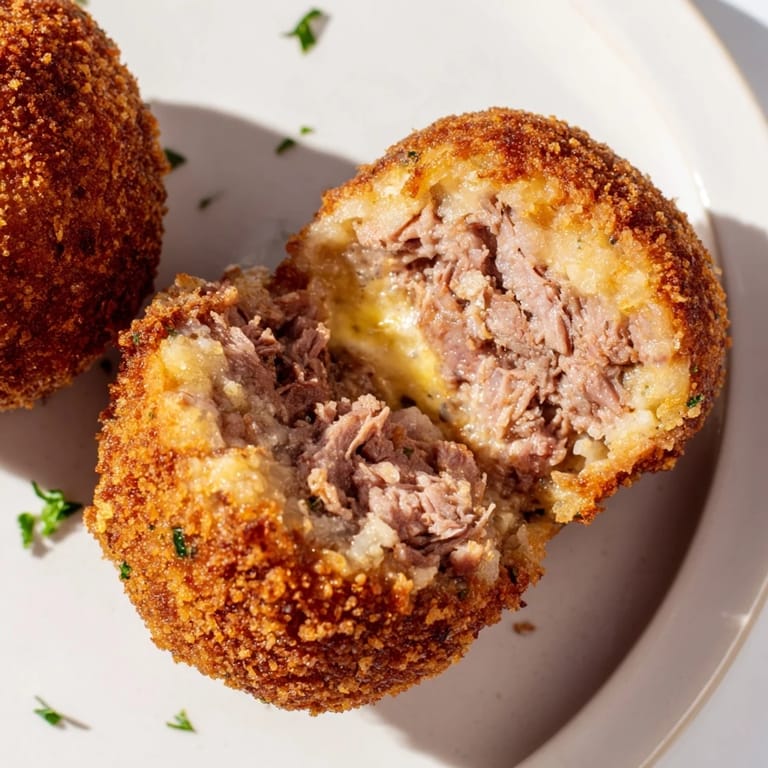
Save The first time I bit into a proper Dutch croquette was at a tiny café in Amsterdam on a grey afternoon, and I understood immediately why they're so beloved—that sharp, satisfying crunch followed by the creamy beef ragout inside felt like a small revelation. Years later, I finally tracked down how to make them at home, and it turns out the magic isn't complicated, just methodical: tender beef simmered until it falls apart, bound in a silky béchamel, chilled until firm, then fried until golden. My kitchen smells incredible when these are cooking, and I can never make just ten because someone always wants a second one.
I made these for a dinner party once and watched everyone's faces light up when they bit in—there's something about homemade croquettes that makes people pause mid-conversation. One guest asked if I'd bought them from a Dutch bakery, which felt like the highest compliment I could get.
Ingredients
- Stewing beef (250 g): Chuck or another tough cut actually works better than tender meat here because it breaks down into shreds that bind beautifully with the filling; the long simmer is what makes it tender.
- Beef broth (500 ml): Use good broth if you can—it's the backbone of the filling and makes a real difference in depth.
- Bay leaf and onion: These season the beef gently while it cooks; they come out before the final filling but their flavor stays behind.
- Butter (40 g for roux, 1 tbsp for onion): Don't skimp here—it creates the roux that binds everything into that creamy texture.
- All-purpose flour (40 g for roux, 100 g for coating): The roux flour thickens the béchamel; the coating flour helps the egg and breadcrumbs stick evenly.
- Whole milk (150 ml): This tempers the beef flavor and creates the smooth, spoonable filling before chilling.
- Nutmeg and parsley: A whisper of nutmeg is typically Dutch, and parsley adds a bit of brightness if you want it.
- Eggs (2 large): These bind the breadcrumbs to the croquettes; beat them well so they coat evenly.
- Breadcrumbs (150 g): Panko or Dutch paneermeel gives the best crunch; fine dry breadcrumbs work too.
- Neutral oil: You need enough to submerge the croquettes completely, so have about 1 liter on hand.
Tired of Takeout? 🥡
Get 10 meals you can make faster than delivery arrives. Seriously.
One email. No spam. Unsubscribe anytime.
Instructions
- Simmer the beef:
- Put your beef, broth, bay leaf, and a pinch of salt into a saucepan and bring it to a boil, then drop the heat and let it bubble gently for about an hour—you want the meat so tender it falls apart when you stir it. The kitchen will smell deeply savory and rich. Remove the beef with a slotted spoon, shred it finely with two forks, and set it aside; measure out 200 ml of that cooking liquid and set that aside too.
- Build the base:
- Melt 1 tablespoon of butter in a skillet and add your finely chopped onion, letting it soften and turn golden for a few minutes until it's sweet and translucent. Add your shredded beef back in, stir well, season with pepper and a touch more salt if it needs it, then set this mixture aside.
- Make the béchamel:
- In a clean saucepan, melt 40 g of butter over low heat, then stir in 40 g of flour and cook for a couple of minutes, stirring constantly—this roux should smell toasty but not brown. Slowly pour in the reserved beef broth and milk, whisking as you go to avoid lumps, until you have a smooth, thick sauce that coats the back of a spoon.
- Combine everything:
- Fold the beef and onion mixture into your béchamel, add the nutmeg and parsley if you're using it, then taste and adjust the salt and pepper until it's as flavorful as you want. The filling should be thick and creamy, almost like a very stiff mashed potato. Spread it in a shallow dish, cover it with plastic wrap, and refrigerate for at least an hour, or until it's completely firm and easy to handle.
- Shape the croquettes:
- Once the filling is chilled solid, use two spoons or damp hands to shape it into 10 cylinders about 8 centimeters long—they should be compact and hold their shape without breaking. If the filling is too soft while you're working, pop it back in the fridge for a few minutes.
- Set up breading:
- Arrange three shallow bowls in a row: flour in the first, beaten eggs in the second, and breadcrumbs in the third. Take each croquette and roll it through the flour until it's lightly coated all over, then dip it in egg until covered, then roll it in breadcrumbs, pressing gently so they stick. For extra crispiness, you can dip it back in egg and breadcrumbs one more time.
- Fry until golden:
- Heat your oil to 180°C (350°F)—a thermometer is really helpful here, or test with a tiny piece of bread that should turn golden in about 60 seconds. Working in batches so you don't crowd the pan, carefully lower croquettes into the hot oil and let them fry for 3 to 4 minutes until they're a deep golden brown. Drain them on paper towels and keep the finished ones warm while you fry the rest.
- Serve:
- Eat them hot, ideally with a good mustard for dipping and maybe some fries on the side—this is how the Dutch do it, and they know what they're doing.
 Save
Save There's a moment when you pull the first croquette from the oil and it's crackling and steaming and perfectly golden, and you know you've made something worth the effort. My grandmother would have loved these.
Making Ahead and Freezing
One of the best things about croquettes is that they freeze beautifully at the breaded stage, so you can bread them, lay them on a tray, freeze them solid, then bag them and pull them out whenever you want a snack. Just add an extra minute or two to the frying time if they're going in straight from the freezer, and the oil will bubble and sizzle in a satisfying way when they hit it.
Variations and Substitutions
The classic filling is all beef, but I've played around with swapping part of it for ground veal, which gives a slightly more delicate flavor. You can also experiment with adding a tiny bit of Worcestershire sauce or a mustard powder to the béchamel for extra depth, and some people like a small dice of ham mixed in with the beef. The filling is forgiving once you understand how to make the base—once you've got that down, you can fold in almost anything you like.
Pairing and Serving
Croquettes are never just a snack—they're a whole experience when you serve them with the right sides and drinks. The traditional pairing is thick-cut fries, a sharp mustard, and a cold pilsner or pale lager that cuts through the richness beautifully.
- Crispy on the outside and steaming inside is the ideal moment to eat them, so time your frying so they're done just before people sit down.
- If you're making these for a party, you can fry them ahead and reheat them in a 180°C oven for about 5 minutes until they're warm and crispy again.
- Always use a spider strainer or slotted spoon to fish them out of the oil so you don't tear them.
 Save
Save Making croquettes from scratch feels a bit like alchemy—turning simple beef and butter and flour into something that tastes like it took hours, even though most of that time is just waiting for things to chill. Once you've made them once, you'll understand why they're such a beloved Dutch tradition.
Recipe FAQs
- → What cut of beef is best for the filling?
Stewing beef such as chuck works best as it becomes tender and flavorful when simmered slowly.
- → How is the creamy filling achieved?
A roux of butter and flour is cooked and combined with milk and reserved beef broth to create a thick, smooth sauce that coats the meat.
- → Why chill the filling before shaping?
Chilling firms the filling, making it easier to shape into cylinders without losing form during breading and frying.
- → What type of breadcrumbs provide the best texture?
Fine dry breadcrumbs like panko or Dutch paneermeel give the croquettes a light, crispy coating after frying.
- → Can these croquettes be prepared ahead of time?
Yes, they can be breaded and frozen before frying. When cooking from frozen, add 1–2 extra minutes to frying time.
- → What oil should be used for frying?
Neutral oils with high smoke points such as sunflower or canola oil are ideal for deep frying the croquettes evenly.