Save
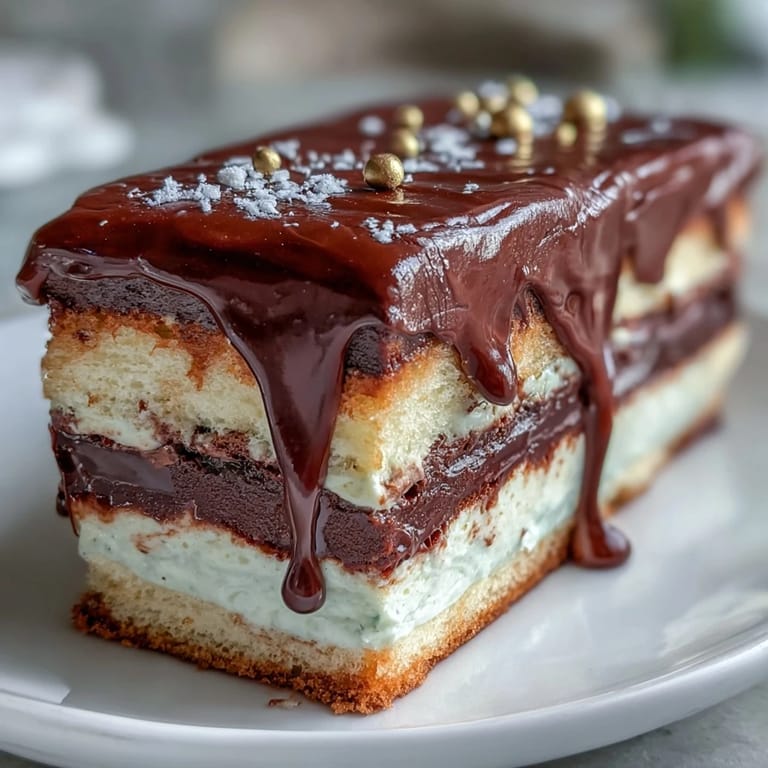
Save My friend texted me a photo of her graduation cap mid-throw, and I knew exactly what I had to bake. This cake emerged from that moment—a celebration of her years of late-night studying, coffee-fueled cramming sessions, and finally crossing the finish line. The white chocolate drip feels elegant without trying too hard, while those edible gold balloons capture the pure joy of achievement. It's the kind of cake that makes people pause mid-conversation, pull out their phones, and actually want to eat a slice of pure happiness.
I made this for my neighbor's daughter last June, and watching her face when she saw those gold balloons cascading down the sides felt like I'd baked pure magic. Her mom kept saying it was too beautiful to cut, but we did anyway, and somehow the taste matched the presentation—which almost never happens. That's when I realized this cake works because it feels celebratory on every level, not just in appearance.
Ingredients
- All-purpose flour: Two and a half cups gives structure without heaviness; I learned the hard way that sifting it before measuring prevents dense layers.
- Baking powder: Two and a half teaspoons is crucial for that cloud-like crumb that makes people ask if it's store-bought.
- Unsalted butter: Two cups total split between cake and buttercream; room temperature means it creams properly instead of staying grainy.
- Granulated sugar: Two cups for the cake; creaming it with butter for three full minutes creates tiny air pockets that make the cake rise beautifully.
- Large eggs: Four eggs, also room temperature, because cold eggs won't incorporate smoothly and you'll end up with a dense, deflated cake.
- Pure vanilla extract: One tablespoon for the cake plus one teaspoon for the buttercream; use pure extract, never imitation, or the whole delicate flavor disappears.
- Whole milk: One cup at room temperature, alternated with flour to keep the batter silky and light.
- Powdered sugar: Four cups sifted for the buttercream; sifting prevents lumps that will never fully dissolve no matter how hard you beat.
- White chocolate: Six ounces melted for the buttercream and another six ounces for the drip; choose quality white chocolate or it'll taste waxy and disappointing.
- Heavy cream: Two to three tablespoons for buttercream consistency, plus another quarter cup for the ganache drip.
- White chocolate crispy pearls or malt balls: One cup becomes your edible gold balloon base; they provide a fun crunch and festive shape.
- Edible gold spray or luster powder: The final touch that transforms simple pearls into celebration-worthy decorations.
Tired of Takeout? 🥡
Get 10 meals you can make faster than delivery arrives. Seriously.
One email. No spam. Unsubscribe anytime.
Instructions
- Prepare your pans and preheat:
- Set your oven to 350°F and grease three eight-inch round pans, lining them with parchment—this prevents sticking and makes removing those delicate layers stress-free. Having everything ready before you start mixing means you won't panic when batter's waiting.
- Combine dry ingredients:
- Whisk together flour, baking powder, and salt in a medium bowl until they're evenly distributed. This prevents pockets of baking powder that cause bitter spots.
- Cream butter and sugar:
- Beat room-temperature butter and sugar for a full three minutes until pale and fluffy; you're looking for the texture of wet sand, not a dense paste. This step is non-negotiable for tender cake.
- Add eggs and vanilla:
- Drop in eggs one at a time, beating after each addition so they fully incorporate, then add vanilla and mix until smooth. Rushing this step results in a curdled-looking batter that still bakes fine but won't rise as high.
- Alternate wet and dry ingredients:
- Starting and ending with flour, add the flour mixture and milk in three additions on low mixer speed, stirring just until combined. Over-mixing develops gluten and toughens your cake, so resist the urge to beat it smooth.
- Bake with confidence:
- Divide batter evenly among pans, smooth the tops, and bake for thirty to thirty-five minutes until a toothpick inserted in the center comes out clean. The kitchen will smell like vanilla dreams, which is how you know you're on the right track.
- Cool completely:
- Let cakes rest in pans for ten minutes, then turn out onto wire racks to cool completely before touching them with frosting. Warm cake will melt buttercream and create a sad, sliding situation.
- Make the buttercream:
- Beat softened butter until smooth, then gradually add sifted powdered sugar while mixing to avoid clouds of sugar dust everywhere. Stir in melted white chocolate, vanilla, salt, and cream, beating until light and fluffy—this takes longer than you think but creates that pillowy texture.
- Level and crumb coat:
- Slice the tops off cooled cakes if they peaked, place the first layer on your serving plate, and spread with buttercream. Layer and frost all three cakes, then coat everything with a thin layer of frosting and chill for thirty minutes.
- Apply the final frosting:
- Once the crumb coat is set, apply a generous final layer of buttercream, smoothing the sides and top with an offset spatula until it looks intentional. Don't stress about perfection; the drip will hide minor flaws.
- Create the white chocolate drip:
- Heat cream until just simmering, pour it over chopped white chocolate, wait one minute, then stir until glossy and smooth. Let it cool to room temperature so it's pourable but sets up properly on the cake.
- Drip with drama:
- Using a spoon or squeeze bottle, let white chocolate ganache cascade down the top edge of the cake in an organic, uneven pattern. Fill the center with more ganache and smooth it with a spatula, then step back and admire your work.
- Create gold balloons:
- Spray crispy pearls or malt balls with edible gold spray (or toss them in luster powder with a tiny bit of water), let them dry completely, then insert toothpicks or thin cake wires. Arrange them in a festive cluster on top like you're celebrating something big, because you are.
- Final chill and serve:
- Refrigerate the finished cake until serving time, then bring it to room temperature for the best flavor and texture. Slice carefully with a warm, wet knife, wiping between each cut for clean edges.
 Save
Save I remember frosting this cake at midnight before a celebration and realizing that baking for someone's milestone moments is its own kind of magic. The cake doesn't just taste good—it becomes part of how they remember their achievement, which is why getting these details right actually matters.
The Science of Tender Cake
White cake achieves its delicate crumb through three things: proper creaming of butter and sugar to incorporate air, alternating wet and dry ingredients to avoid over-mixing, and using whole milk instead of buttermilk. The vanilla extract adds depth without competing flavors, while the white chocolate buttercream echoes the cake's subtle sweetness rather than overwhelming it. I've made this cake with melted butter instead of creamed butter once, and the texture turned dense and tight—never again.
Why White Chocolate Works Here
White chocolate feels fancy without tasting overly complicated, which matches the celebration vibe of a graduation cake. The buttercream incorporates melted white chocolate beautifully because they're already similar in texture and temperature, creating something silky and spreadable. The drip, made from white chocolate and cream, has just enough body to cascade dramatically but sets quickly enough to hold its shape instead of sliding all the way to the table.
Making This Cake Your Own
The base recipe is flexible enough to adapt without losing its elegance. You can infuse the simple syrup with lemon or almond flavoring if vanilla feels too plain for your crowd, or substitute the white chocolate crispy pearls with edible pearls in school colors to make it even more personal. The gold decoration works because it's celebratory, but you could easily swap in fresh berries, chocolate shards, or even fresh flowers depending on the occasion.
- Add a tablespoon of vanilla bean paste to the batter for an even more pronounced vanilla flavor that feels special.
- If you're short on time, gold-wrapped chocolate candies work beautifully instead of the pearl-and-spray approach.
- Keep the finished cake in the refrigerator up to three days, but always bring it to room temperature before serving so the flavors come forward.
 Save
Save This cake exists at the intersection of simple and stunning, which is exactly where celebration cakes should live. Make it for someone's big moment and watch their face light up knowing you chose to bake rather than buy.
Recipe FAQs
- → How do I achieve a smooth white chocolate drip?
Gently heat cream until just simmering, then pour over finely chopped white chocolate. Let it sit briefly before stirring until smooth. Cool to room temperature before dripping to ensure a controlled cascade.
- → What is the best way to keep the vanilla sponge moist?
Alternate adding the flour mixture and milk to the creamed butter and sugar slowly, avoiding overmixing. Bake until a toothpick comes out clean to retain moisture.
- → How can I make the gold balloons decoration?
Spray white chocolate crispy pearls or malt balls with edible gold spray or roll them in gold-dusted luster powder. Let dry completely before arranging on toothpicks or thin wires for a festive cluster.
- → Can I prepare the cake layers in advance?
Yes, bake and cool the layers fully, then wrap and refrigerate. Bring to room temperature before assembling and decorating for best results.
- → What tools are essential for decorating this cake?
Use an electric mixer for buttercream, offset spatula for smoothing, parchment-lined cake pans for even baking, and a squeeze bottle or spoon for the drip application.