 Save
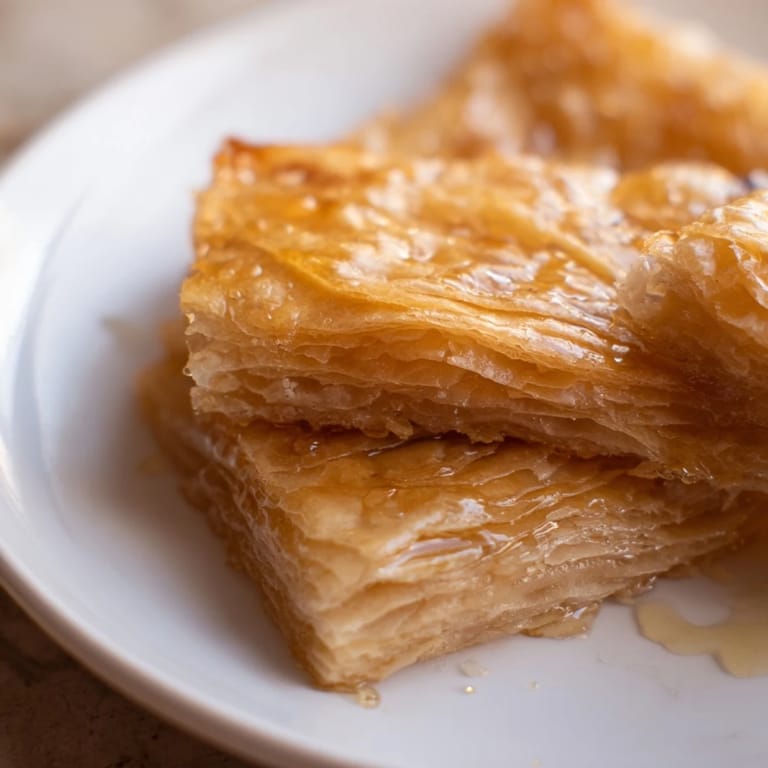
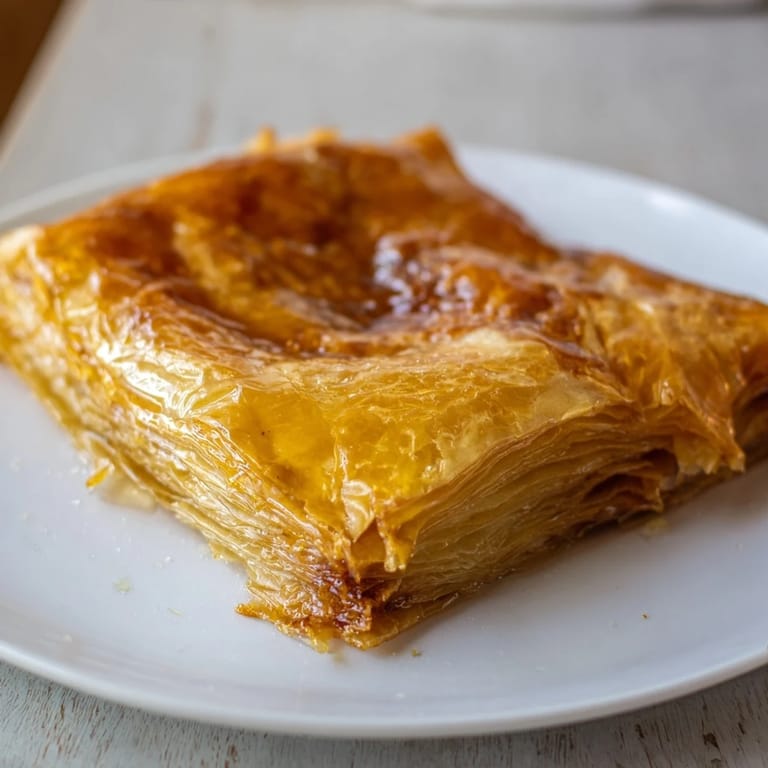
Save I first tasted msemen at a small café in Marrakech, where the owner's grandmother was flipping them in an ancient cast-iron pan, the kitchen filling with the smell of butter and semolina hitting hot oil. She handed me one still steaming, the layers crackling under my fingers, and drizzled it with honey that pooled in the folds. That moment taught me that some of the world's best things are deceptively simple, and I've been chasing that feeling in my own kitchen ever since.
My sister arrived unannounced on a Sunday morning, and I panicked about breakfast until I remembered I had flour and butter. Two hours later, we were sitting on the kitchen counter eating warm msemen straight from the pan, arguing about whether it needed more honey, and she said it was the best thing I'd ever made. It wasn't really, but it felt true in that moment.
Ingredients
- All-purpose flour (2 cups): The foundation of your dough, and the key is not to skimp on kneading, which builds the gluten structure that gives msemen its signature flakiness.
- Fine semolina (1 cup): This is what makes msemen different from regular flatbread; it creates a slight graininess that toasts beautifully and adds texture.
- Sugar and salt (1 tsp each): Just enough to season the dough subtly without making it taste sweet.
- Warm water (1 1/4 cups): Add it gradually so you can feel the dough come together; you may not need all of it.
- Instant yeast (1 tsp, optional): If you use it, you'll get slightly puffier pastries, but skip it if you prefer denser layers.
- Vegetable oil and melted butter (1/2 cup oil plus 1/4 cup butter): The oil keeps everything from sticking while you work, and the butter is brushed between folds for richness.
- Semolina for dusting (1/4 cup): Sprinkle this between the folds before frying to create that signature crunch.
- Honey for serving: Warm it slightly so it flows into the pastry's nooks, which is honestly half the point.
Tired of Takeout? 🥡
Get 10 meals you can make faster than delivery arrives. Seriously.
One email. No spam. Unsubscribe anytime.
Instructions
- Make the dough:
- Mix your flour, semolina, sugar, salt, and yeast in a bowl, then slowly pour in warm water while stirring until you have a shaggy dough. Knead it for a good 10 minutes—your arms will get tired, but that's exactly what you want—until it's smooth and slightly elastic. Cover it and let it rest for 15 minutes while you drink some tea.
- Divide and prep:
- Turn your dough out onto an oiled surface and cut it into 8 equal pieces, rolling each one into a ball. Keep your hands and work surface slick with oil because dry dough is your enemy here.
- The delicate stretch:
- This is where the magic happens and also where patience matters most. Take one dough ball and, using only your fingertips and the heels of your hands, gently stretch it into a thin, almost see-through circle. You're aiming for translucent but not torn.
- Brush, sprinkle, fold:
- Once stretched, brush the entire surface with melted butter and sprinkle with semolina. Now fold one edge toward the center, brush that flap with butter, sprinkle more semolina, then repeat with the opposite side, then the remaining two sides, creating a rough square. You'll brush and sprinkle at each fold—this layering is everything.
- Rest the squares:
- Let your folded msemen sit for 5 minutes before frying; this helps them hold their shape when they hit the heat.
- Pan-fry to golden:
- Heat a non-stick skillet over medium heat with a light brush of oil. Gently press each square so it's about 1/4-inch thick, then fry for 2 to 3 minutes per side until deep golden brown and crackling. The sound is your cue—when it stops sizzling as much, it's probably done.
- Serve and drizzle:
- Place each hot msemen on a plate and pour warm honey over it generously, letting it soak into the layers. Eat it immediately, burning the roof of your mouth if necessary.
 Save
Save I once made msemen for a group of friends who had never tried it before, and watching their faces when they bit into the hot honey-soaked pastry was worth every sticky-fingered moment. One friend asked if I'd made the pastry myself and seemed shocked that something so restaurant-quality came from my small kitchen. I didn't tell him it was only my fifth attempt.
The Art of Stretching
The stretching step feels intimidating at first because you're terrified of ripping the dough, but the more you practice, the more it becomes a meditation. Your hands learn the exact pressure needed, and you stop thinking about it. I've found that the best stretches happen when you're not overthinking, when you just let your instincts take over.
Flavoring Beyond Honey
While warm honey is the traditional finishing touch, msemen becomes a different kind of delicious with a swirl of amlou—that almond and honey paste that tastes like pure comfort. Some mornings I add a pinch of ground cinnamon to the dough itself, or a whisper of orange blossom water for something more fragrant. The pastry is a blank canvas, and the beauty is that you get to decide what it becomes.
Storing and Reheating
Leftover msemen won't stay crispy forever, but they reheat beautifully in a skillet over low heat, where they regain some of their original texture. I've also warmed them wrapped in foil in a 300-degree oven, which works just fine. Store them in an airtight container and eat them within a couple of days, though honestly, they rarely last that long in my house.
- A quick pan-fry brings back the crackle even if they've sat overnight.
- You can assemble msemen the night before and fry them fresh in the morning.
- Reheated msemen with fresh honey tastes almost as good as the first time, if you eat them with the right person.
 Save
Save There's something about making msemen that feels less like following instructions and more like learning a tradition, one warm pastry at a time. Once you've made it once, you'll keep coming back to it.
Recipe FAQs
- → What makes Msemen flaky?
Flakiness comes from folding the dough with melted butter and semolina, creating multiple layers that crisp up when pan-fried.
- → Can I use instant yeast in the dough?
Yes, adding instant yeast lightens the texture slightly but it's optional for traditional results.
- → How should Msemen be cooked for best texture?
Pan-fry over medium heat, turning after 2–3 minutes until golden brown on both sides for a crisp, tender finish.
- → What are common serving suggestions?
Serve warm drizzled with honey or alongside amlou almond-honey spread, and fresh jams for added flavor.
- → Can leftover Msemen be reheated?
Yes, reheat gently in a skillet or toaster to restore crispness without drying out the layers.